Water Pressure Issues
*Special Thanks to the Town of Castle Rock for putting together this fantasic information.
The only thing that likes a lot of water pressure is you, in the shower! Excessive pressure is actually very detrimental to the longevity of any appliance, including sprinkler systems. However, pressure issues happen and we have a few troubleshooting tips for you to try. This is basic information and is not a substitution for professional plumbing advice.
First, locate your water meter. Most meters are in your basement along the wall closest to the street. Some may have a meter located in a pit in the front yard
Checking pressure levels
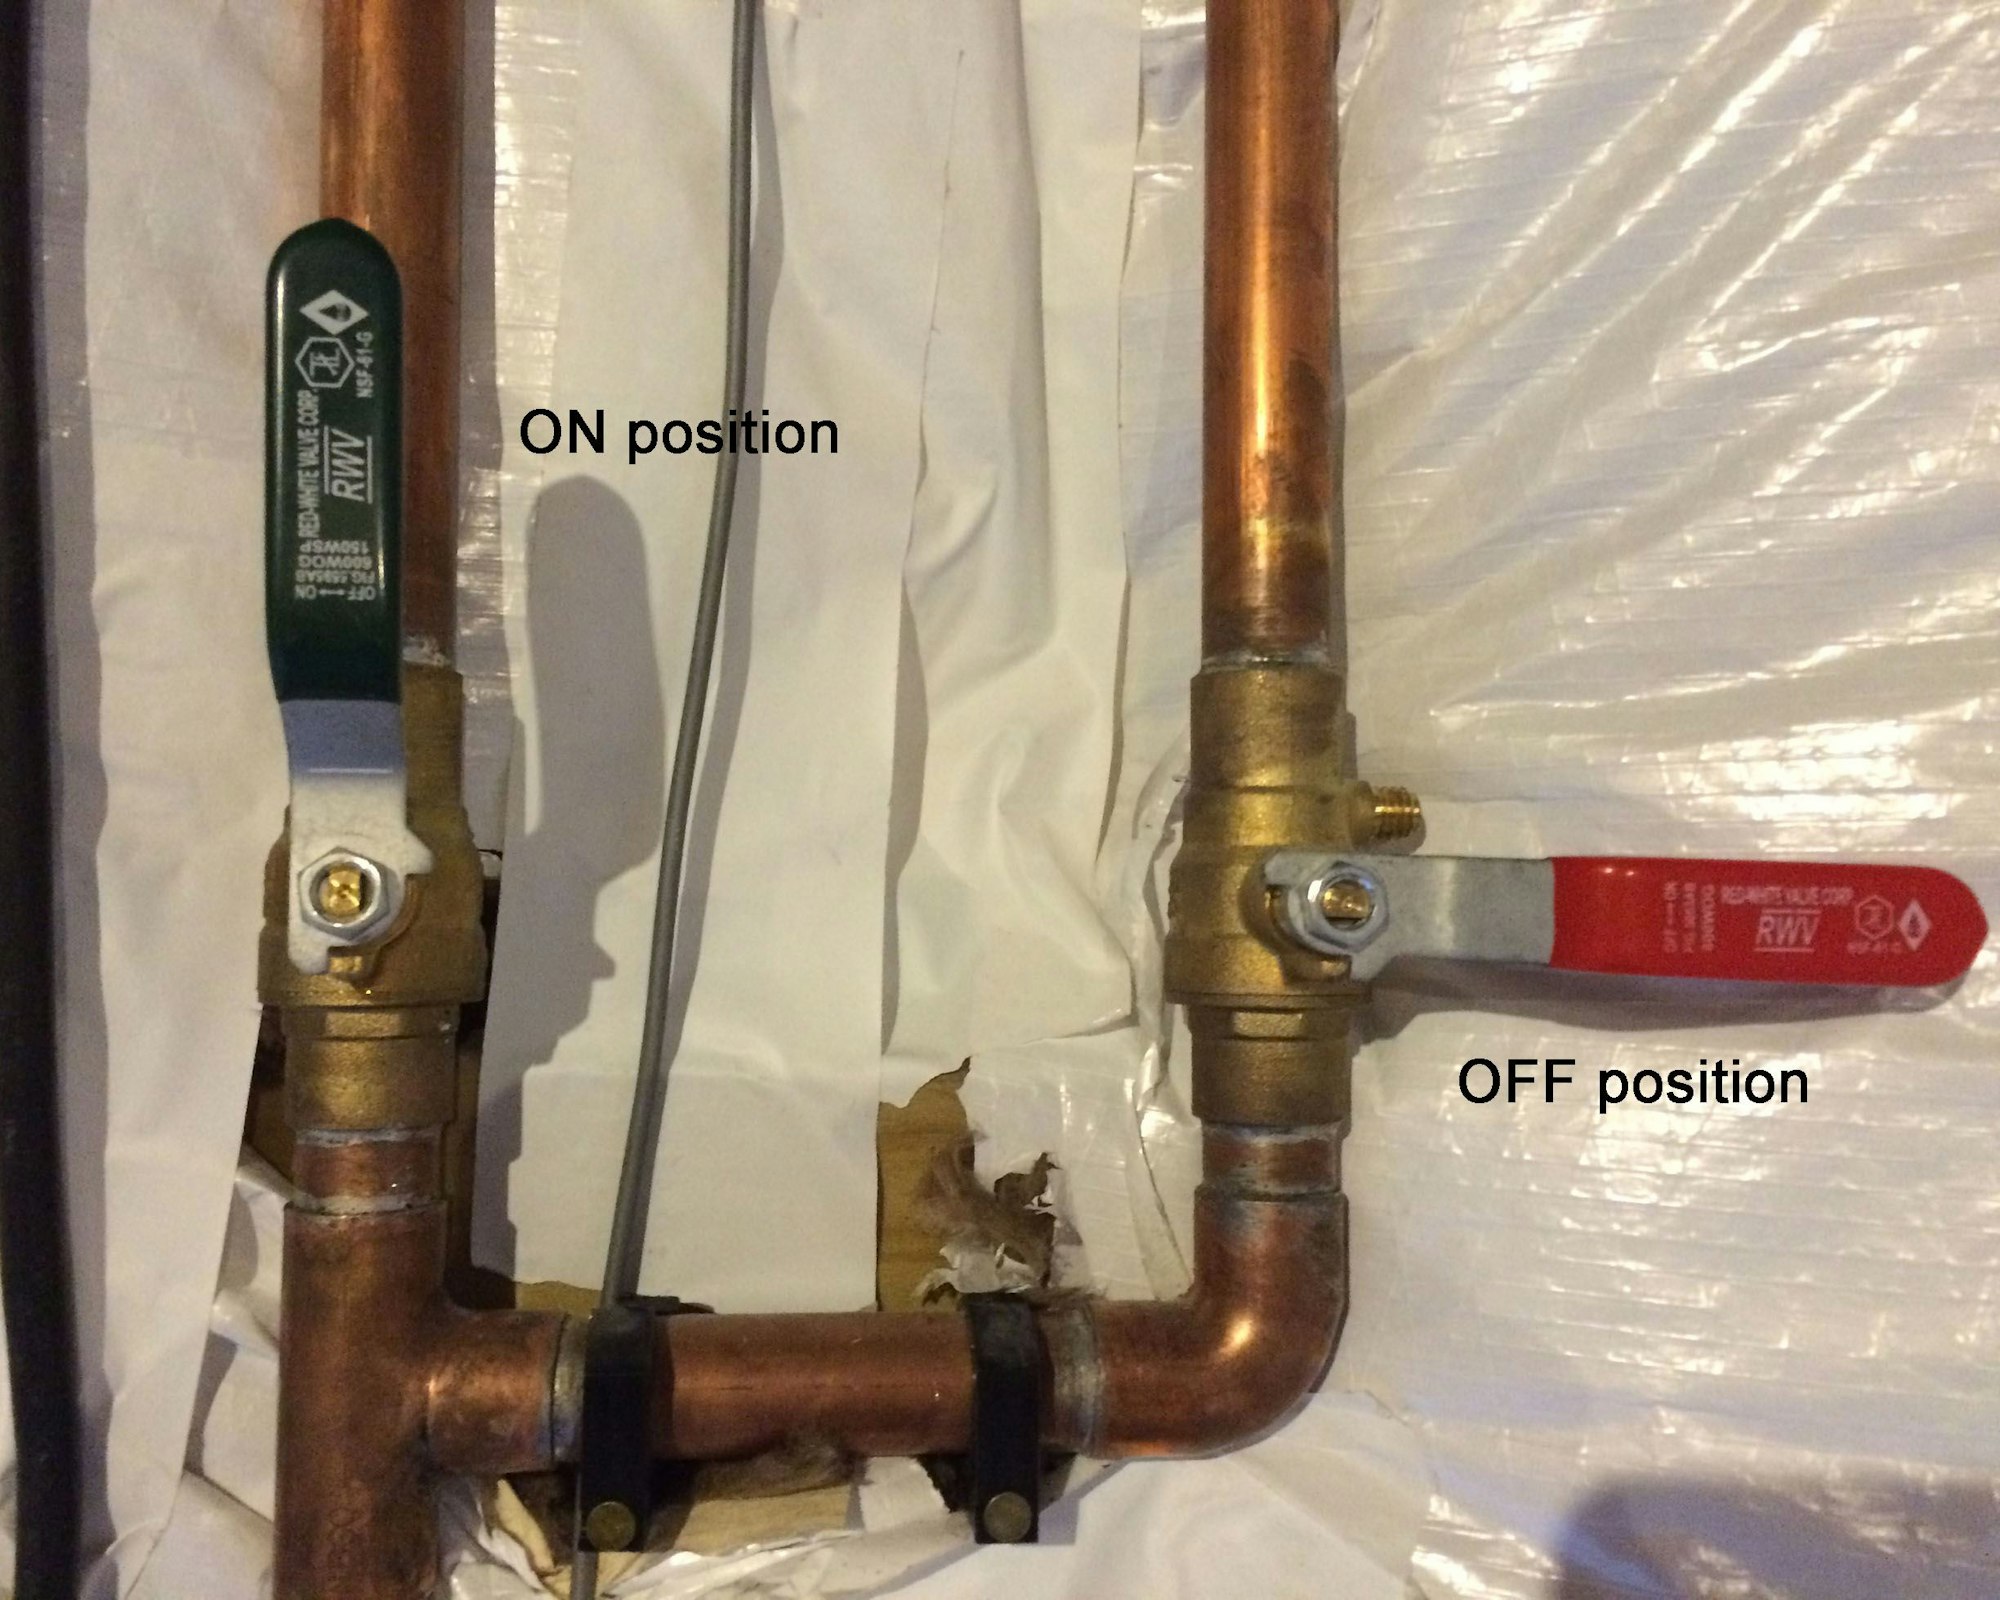
1. Check the shut-off valves
Check your shut-off valves to ensure that they are in the fully open position. You could have one of two types of handles:
- Lever-type handles should be parallel with your pipe. If your handle is perpendicular or at an angle to the pipe it indicates the valve is partially or completely closed.
- Rounded handle should be opened all the way counter clockwise. If you turn it to the right and it won't move, then it is in the closed position.

2. Check your pressure at an outside hose bib
To check the water pressure, make sure there is no water being used in the house or the irrigation system. A pressure gauge, which you can purchase at a home improvement center for usually less than $15, should be threaded to the hose bib like you would a garden hose. Once you have secured the pressure gauge, turn the faucet on all the way.
This will give you a baseline of the water pressure at your hose bib. Standard pressure should be between 40 to 80 pounds per square inch (psi). The targeted pressure is 65 psi. Pressures higher than 75 psi can possibly damage household appliances.

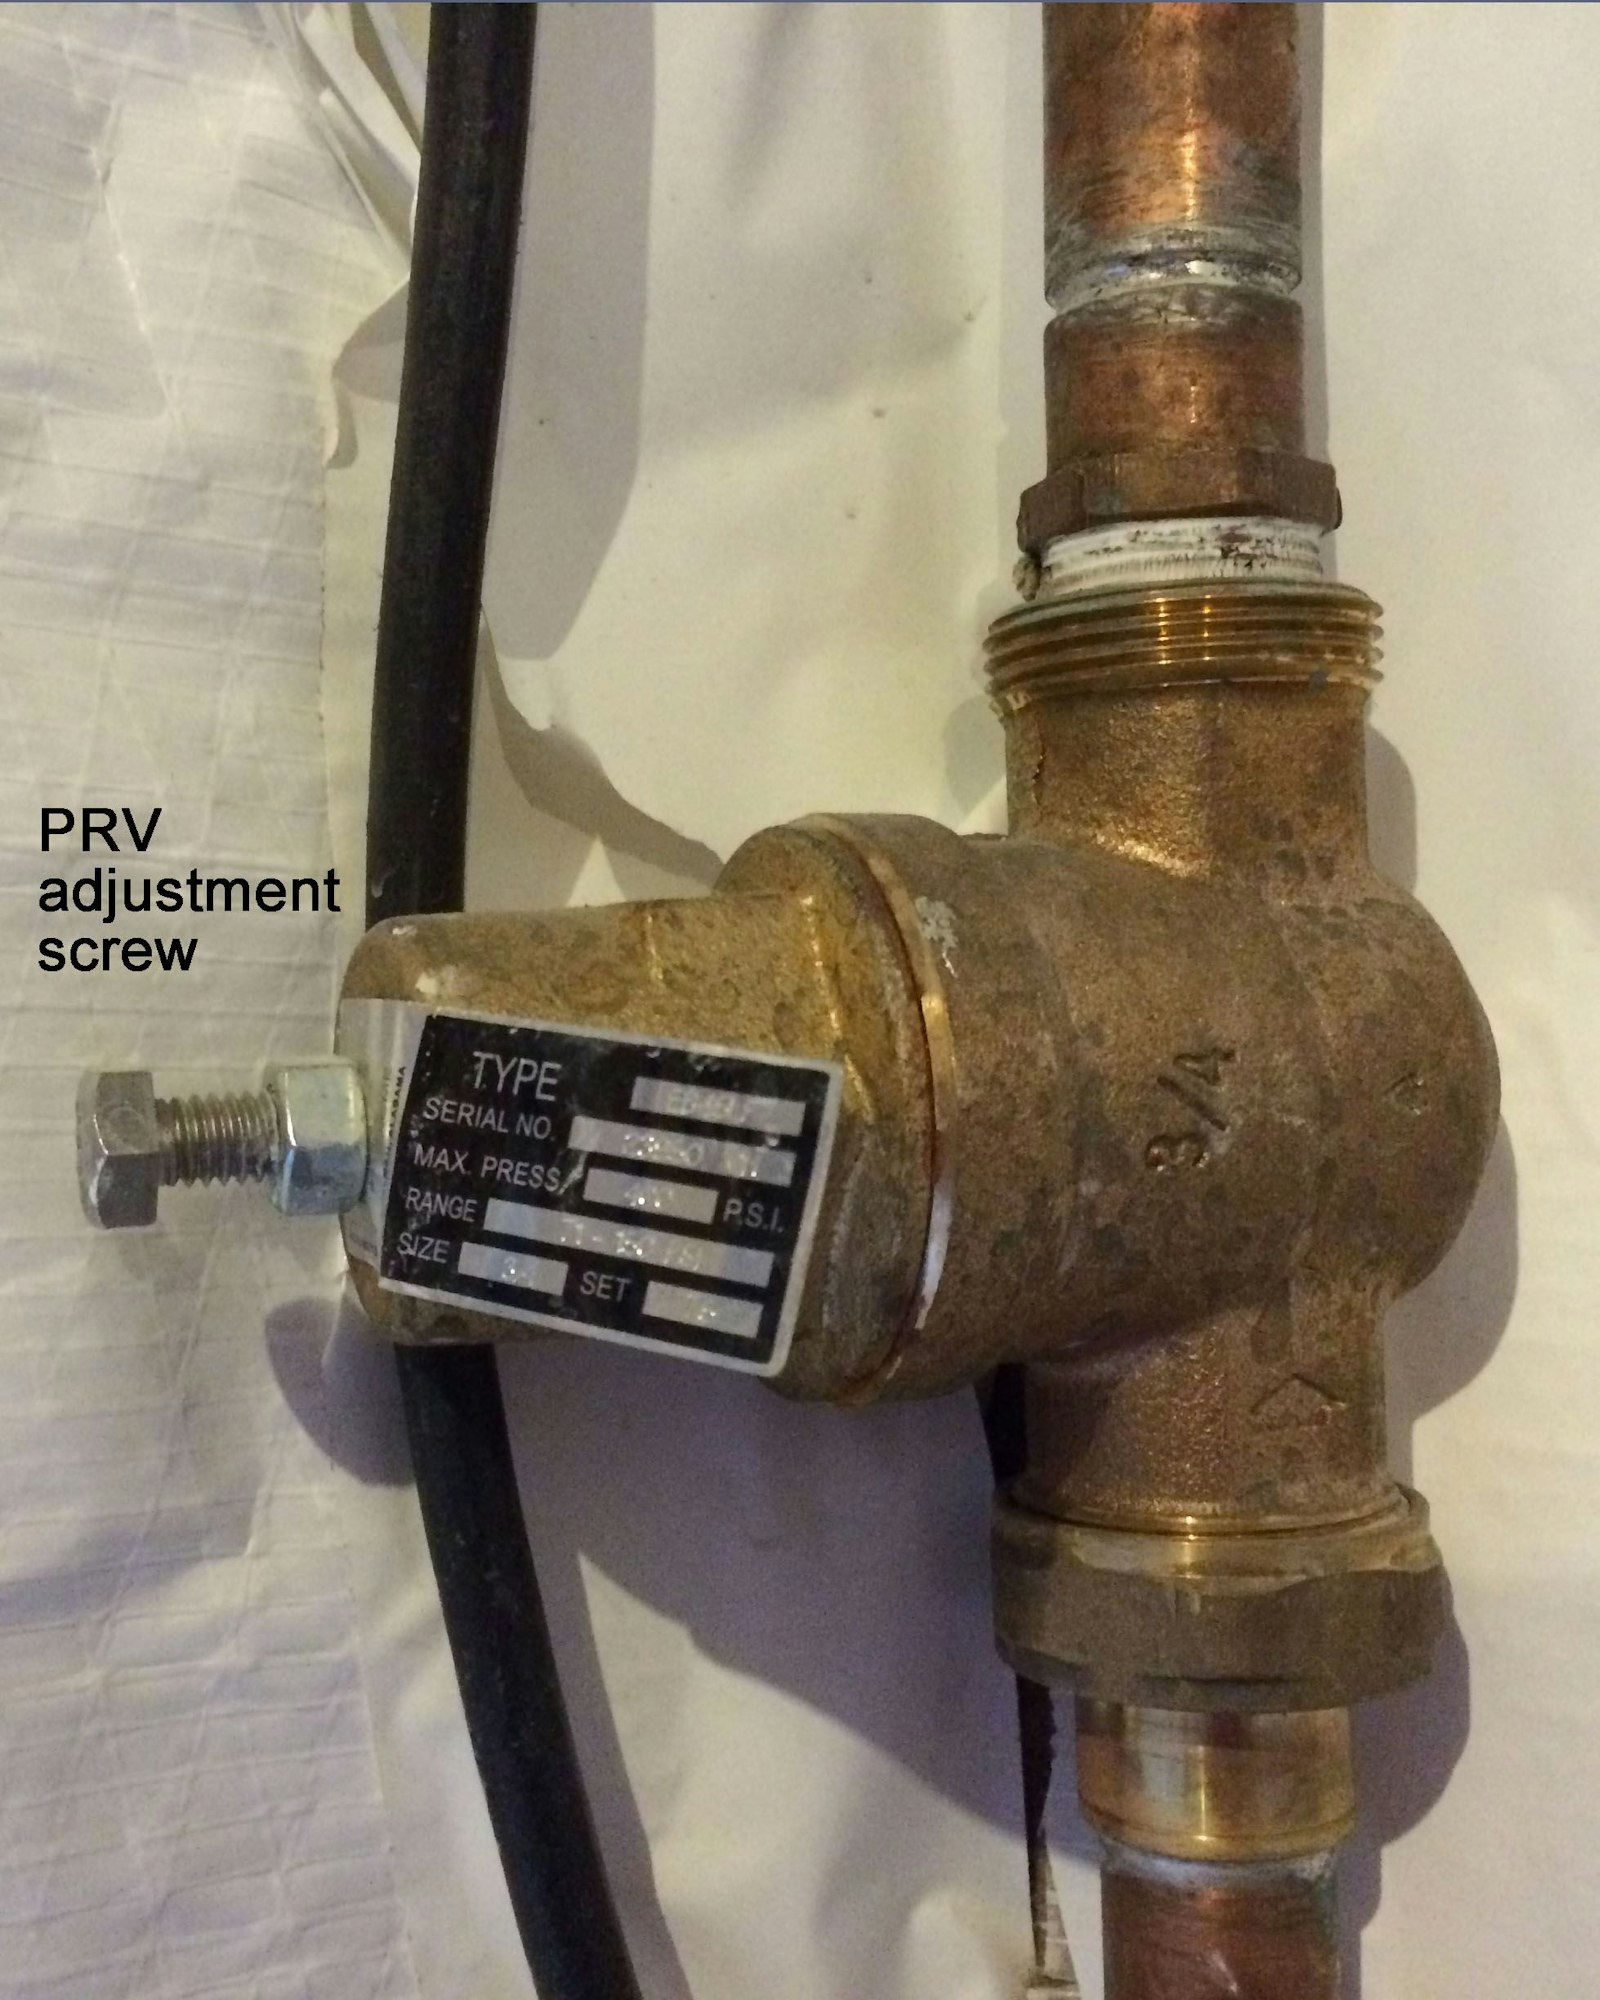
A pressure regulating valve (PRV) can be used to adjust water pressure.
3. Adjusting a pressure regulating valve (PRV)
Once the household pressure has been determined, you may be able to adjust it up or down using your PRV. The PRV is normally located in the basement, where your water shut-offs are located. The PRV is a bell shaped fixture with a lock nut and bolt on the end. Using a flat head screwdriver and a wrench, loosen the lock nut by turning it counterclockwise with a wrench. Do this before adjusting the pressure, which will allow you to maneuver the bolt. Turn the screw clockwise to tighten or increase the pressure, or counterclockwise to loosen lower the pressure. After each full turn of the screw, take a new reading at your outside faucet. This will ensure you are not adjusting the pressure too high or too low.
Remember to count the turns, in case you want to reset the PRV to its original position. The pressure should not be adjusted above 75 psi. Once you have reached the desired water pressure, make sure you re-tighten the lock nut on the PRV.

Is your pressure regulating valve failing?
Water pressure surges often occur when a PRV is starting to fail. The water will come out strongly when the faucet is first turned on and then taper off. This means the PRV is unable to hold and maintain the pressure in your system. A sudden loss of water pressure or flow or sputtering of water may also indicate a failing PRV. However, a sudden high water pressure can indicate a failing water heater expansion tank.
Pressure issues in the irrigation system
If your irrigation system has too little or too much pressure, it is most likely due to a broken or clogged part.
1. Check your irrigation backflow preventer valve

Inspect the pressure vacuum breaker valve to make sure that the mechanism inside has not cracked and is not leaking. These are normally located outside of your house, above your sprinkler control box.
The PVB should be installed within 18 inches of the connection to the water source; installed 12 inches above the highest sprinkler head or drip emitter. Your system will not pressurize properly if the valve is stuck in a partially closed position, is clogged with debris, has a cracked o-ring, or is leaking. A primary reason for a broken PVB is improper winterization.
2. Examine your sprinkler control valve box
Gently turn the sprinkler solenoid valves to ensure they are not stuck in a partially open position, causing reduced flow to the other valves. Examine the wires and fittings to make sure they are intact. A wet or water filled valve box may indicate a leak.

3. Examine your sprinkler system
Make sure the sprinkler heads are operating properly. Look for cracked or broken plastic head casings, heads that don't pop up, or water that sprays wildly or not at all. Dirt can get inside sprinkler heads and their filters, causing them to clog up. Clogged or dirty heads may rise, but fail to spray, not lower after watering, or produce an erratic spray pattern.
If the last sprinkler in a line is not working, there may be too many sprinklers on that line; or, they may be exceeding the available pressure/flow gallon per minute (gpm). When you replace sprinkler heads, make sure they are sized appropriately, checking the gpm output on replacement heads, to make sure the output is the same or less than the original sprinkler head.
4. Checking for sprinkler line leaks
One way to determine if you have a leak in your irrigation system is to check your meter. If your irrigation system is off and the flow indicator is moving or the numeric display increases, this means there is water moving through the meter. Turn off the water supply valve to your sprinkler system. If the flow indicator or digital display stops moving, then you have isolated the leak to your sprinkler system. (If it continues to move, then water is running or leaking inside the home.) Check out our video on detecting leaks.
Next, turn off all of the solenoid valves in the sprinkler valve control box. If the meter is still running, you have determined that the leak is in the main irrigation line, between the main sprinkler shut-off valve and the valve box. Look for wet areas around the PVB, wet soil or water coming through the foundation into your basement.
The next step is checking for leaks in each line. Using the irrigation timer, run each line. Look for a series of heads that aren't operating properly. The water line problem is usually located between the last working head and the first nonworking head. If it is a large leak, look for bubbling water, a depression in the ground or a very wet area. If you can't locate a leak, keep in mind that a pipe may be crushed or obstructed in some way, restricting the flow of water. A slow leak is more difficult to locate and you may need the services of a professional leak detection firm.
